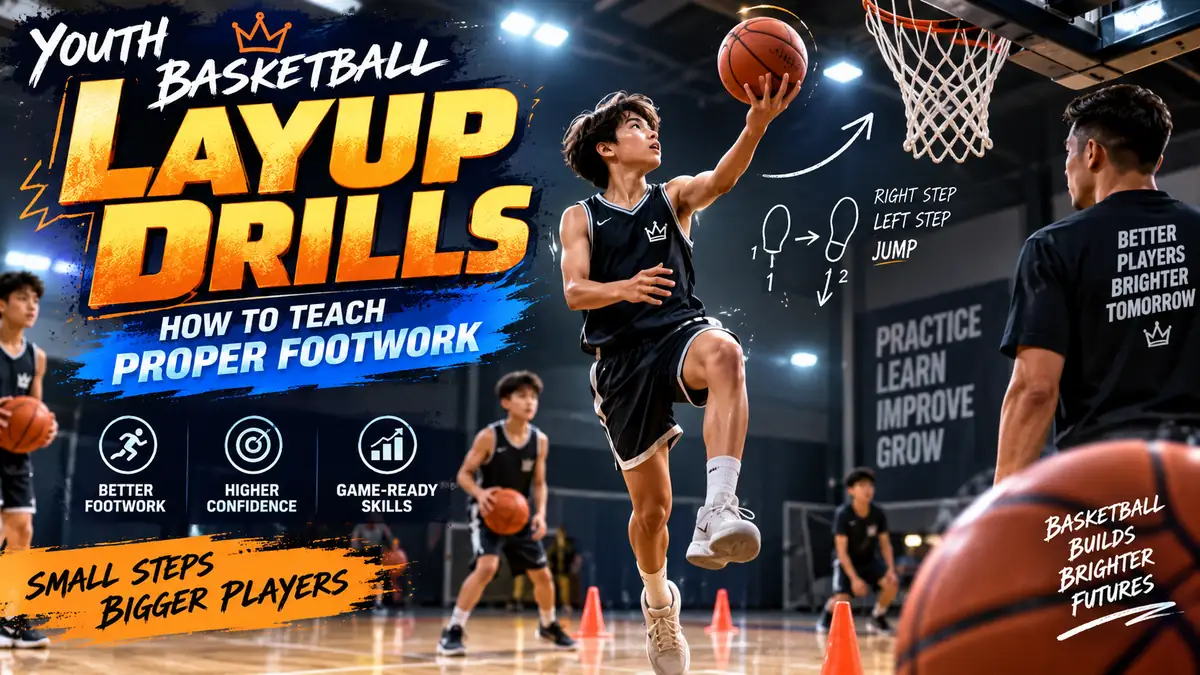
The shot looks simple, but beginners often struggle with the footwork. Players may jump from the wrong foot, take too many steps, lose balance, or focus so much on the basketball that they forget where the backboard is.
Layups are one of the first scoring skills young basketball players should learn.
That is why youth basketball layup drills should begin with movement and coordination before adding speed or defensive pressure.
The goal is not simply to make more layups during practice. Coaches want players to develop footwork they can repeat naturally during games.
The drills below progress from basic steps to more realistic finishing situations.
Why Layup Footwork Matters
A good layup combines several skills at the same time.
Players need to:
- Control the basketball
- Approach the basket at the correct angle
- Coordinate their final steps
- Jump from the appropriate foot
- Protect the ball
- Use the backboard
- Finish while staying balanced
For beginners, performing all of these actions together can feel complicated.
Breaking the movement into smaller parts makes learning easier.
Coaches should emphasize control before speed.
A player who learns correct footwork slowly can usually increase speed later. A player who develops poor habits at full speed may need much more time to correct them.
Start Without a Basketball
One of the best ways to teach layup footwork is to remove the basketball at first.
Young players often become distracted by dribbling and shooting.
Without the ball, they can concentrate entirely on their feet.
For a traditional right-handed layup, teach the basic sequence:
Right step — left step — jump from the left foot.
For a left-handed layup:
Left step — right step — jump from the right foot.
A useful coaching cue is:
“Outside, inside, up.”
The exact wording matters less than using the same simple cue consistently.
Drill 1: Two-Step Layup Footwork
This is the starting drill.
Place players a few feet from the basket.
Do not use a basketball.
Right Side
Players begin with the right foot slightly behind.
They step:
- Right foot
- Left foot
- Jump from the left foot
The right knee rises naturally during the jump.
Left Side
Reverse the sequence:
- Left foot
- Right foot
- Jump from the right foot
The left knee rises.
Players can reach toward the backboard with the finishing hand even though they do not have a ball.
Repeat slowly.
Do not rush.
The goal is to make the foot sequence feel natural.
Drill 2: One-Step Finish
Once players understand the final two steps, simplify the movement further.
Stand players close to the basket with one basketball.
For a right-handed layup, the player begins with the left foot planted.
The player jumps from that foot and finishes with the right hand.
For the left side, use the opposite combination.
This drill teaches the important relationship between:
Opposite foot + shooting hand.
Right hand = left-foot takeoff.
Left hand = right-foot takeoff.
Some young players naturally want to jump from the same-side foot.
Do not overcorrect with long explanations.
Simply repeat:
“Right hand, left foot.”
or:
“Left hand, right foot.”
Drill 3: Two-Step Layup With the Ball
Now combine the footwork with the basketball.
Players start two steps away from the basket.
No dribble is needed yet.
For a right-handed layup:
- Hold the basketball securely.
- Step right.
- Step left.
- Jump from the left foot.
- Extend the right hand toward the backboard.
For the left side, reverse everything.
This drill helps players connect the movement pattern with the finishing action.
Encourage players to keep the ball controlled near the body instead of swinging it low.
Teach Players to Use the Backboard
Beginners often aim directly at the rim.
Using the backboard can make layups easier.
Show players the upper corner of the small square on the backboard as a simple target.
A useful cue is:
“Soft touch off the square.”
Players do not need to throw the ball hard.
The goal is a controlled release.
During early practice, keep players close enough that they can focus on accuracy rather than strength.
Drill 4: One-Dribble Layups
Once the footwork is consistent without dribbling, add one controlled dribble.
Players begin a few steps away.
For a right-side layup:
- Take one dribble.
- Gather the basketball.
- Right step.
- Left step.
- Jump.
- Finish with the right hand.
The dribble should happen before the final two steps.
Young players frequently travel because they do not understand when the dribble ends and the steps begin.
Slow repetitions help.
A useful coaching phrase is:
“Dribble — gather — two steps.”
Drill 5: Cone Approach Layups
Place a cone on the wing approximately 10 to 15 feet from the basket.
The player begins with the basketball near the cone.
They dribble toward the basket at a controlled speed and finish with a layup.
The cone creates a clear starting angle.
Run the drill from both sides.
Coaching Points
Watch for:
- Correct final two steps
- Balanced takeoff
- Eyes toward the target
- Controlled dribble
- Proper finishing hand
- Use of the backboard
Do not allow players to sprint immediately.
Begin at approximately half speed.
Increase the pace only when the footwork remains correct.
Drill 6: Pass, Catch, and Layup
This drill connects passing with finishing.
Place one passer near the top or wing.
The offensive player begins without the ball.
They cut toward the basket.
The passer delivers the basketball.
The receiver catches, gathers, takes the correct two steps, and finishes.
This drill is useful because layups during games often come after receiving a pass rather than dribbling the entire way.
Players who have already practiced basketball passing drills for kids can now connect catching technique with finishing footwork.
Encourage the receiver to prepare the hands before the pass arrives.
Drill 7: Layup From Both Sides
Young players often become comfortable finishing only from their dominant side.
Coaches should introduce both sides early.
Use two lines:
- One on the right side
- One on the left side
Players alternate finishes.
Right side:
Right-hand layup, jump from left foot.
Left side:
Left-hand layup, jump from right foot.
At first, the non-dominant side may feel awkward.
That is normal.
Do not expect equal ability immediately.
The purpose is to build coordination gradually.
Drill 8: Layup With a Passive Defender
Once players can finish comfortably without pressure, add a defender.
The defender begins near the basket but applies only light pressure.
They may raise a hand or move alongside the offensive player without aggressively trying to block the shot.
The offensive player must continue using proper footwork.
This is important because players often abandon technique as soon as a defender appears.
A useful cue is:
“Same steps, even with pressure.”
As confidence improves, increase the defensive pressure gradually.
Teach the Correct Approach Angle
Players should not always attack the basket in a straight line.
Approaching from an angle creates a better backboard target.
Place cones to guide the path.
For a right-handed layup, the player approaches from the right side.
For a left-handed layup, approach from the left.
Avoid starting too close to the baseline because the backboard angle becomes more difficult for beginners.
A comfortable 45-degree angle is usually easier to teach.
Drill 9: Mikan Drill for Beginners
The Mikan Drill is useful for finishing around the basket.
Players stand under the rim.
They finish a right-handed layup on one side, rebound the basketball, step across, and finish with the left hand on the opposite side.
The pattern continues without stopping.
For beginners, perform the drill slowly.
The goal is not speed.
Focus on:
- Correct footwork
- Using both hands
- Jumping from the appropriate foot
- Soft finishes
- Staying balanced
Start with five makes on each side.
Drill 10: Layup Decision Drill
This drill introduces decision-making.
Place the coach near the basket.
The player attacks from the wing.
As the player approaches, the coach gives one signal.
For example:
- Hand down = normal layup
- Hand up = finish higher off the backboard
- Step toward baseline = finish on the opposite side
Keep the choices simple for younger players.
The purpose is to teach athletes to look at the defense while maintaining their footwork.
Connect Layups With Footwork Training
Layup development should connect naturally with basketball footwork drills for youth players.
Jump stops, pivots, balance, and directional changes all influence finishing.
For example, after practicing normal layups, players can work on:
- Jump stop before finishing
- Reverse pivot into a layup
- Shot fake and step-through
- One-two stop near the rim
This helps players understand that finishing is not an isolated skill.
Good footwork makes scoring easier.
Common Youth Layup Mistakes
Jumping From the Wrong Foot
This is one of the most common beginner mistakes.
Use slow repetitions without the ball.
Teach the relationship between the finishing hand and opposite takeoff foot.
Taking Too Many Steps
Young players sometimes gather the basketball too early.
Teach:
“Dribble — gather — one-two.”
This clearly separates the dribble from the final steps.
Looking at the Ball
Players need to see the basket and backboard.
Encourage them to lift the eyes before the final steps.
Throwing the Ball Too Hard
Layups require touch.
Ask players to finish softly off the backboard.
Avoiding the Weak Hand
Players naturally prefer their dominant hand.
Continue practicing both sides, but do not turn every mistake on the weak side into a major correction.
Consistency develops over time.
Protect the Basketball
As defenders are introduced, players need to learn ball protection.
Teach players to keep their body between the defender and the basketball when possible.
For example, on a right-side drive, the player can protect the ball with the body while finishing with the right hand.
Avoid teaching complicated finishing techniques too early.
First build confidence with basic protection and balance.
Use Small-Sided Games
Drills teach technique.
Games teach players when to use it.
Play 1-on-1 or 2-on-2 from the wing.
Encourage players to attack the basket when they gain an advantage.
Watch whether they maintain correct layup footwork during live play.
The transition from drill to game is important.
A player who performs perfect footwork in a line but forgets it during competition still needs more practice.
Avoid Long Lines
Layup drills often create long lines.
That reduces repetitions.
If possible, use both baskets.
Divide players into small groups.
You can also run right-side and left-side stations simultaneously.
More repetitions help footwork become automatic.
Coaches should spend less time watching lines and more time watching movement.
Make Layup Practice Competitive
Competition can add energy.
Try challenges such as:
- First team to 10 made layups
- Five makes on each side
- Three consecutive weak-hand layups
- Right side + left side sequence
- Layup relay with correct footwork required
However, technique should remain part of the scoring.
If a player uses incorrect steps, the basket may not count during the drill.
This rewards good habits instead of only speed.
How Long Should Layup Practice Last?
For many youth teams, 10 to 15 minutes can be enough.
The skill can also appear in other activities.
For example:
- Warm-up layups
- Passing into layups
- Transition layups
- 1-on-1 finishing
- Small-sided games
Consistent exposure is more important than one very long layup session.
Adjust Layup Drills by Age
Younger Beginners
Focus on:
- Footwork without the ball
- One-step finishes
- Two-step finishes
- Backboard use
- Both sides
Intermediate Youth Players
Add:
- Dribbling
- Passing
- Passive defense
- Faster approaches
- Weak-hand finishing
Older or More Experienced Players
Introduce:
- Reverse layups
- Inside-hand finishes
- Euro steps
- Floaters
- Contact finishes
- Decision-making against defenders
Players should master simple finishes before learning advanced ones.
How to Measure Improvement
Do not only count how many layups players make.
Also watch for:
- Correct final steps
- Fewer traveling violations
- Better weak-hand confidence
- Better balance
- More backboard use
- Higher finishing percentage during games
- Better decisions near the basket
The best progress appears when players perform the movement naturally during live play.
Frequently Asked Questions
What are the best youth basketball layup drills?
Two-step footwork, one-step finishes, one-dribble layups, cone approach layups, pass-and-finish drills, Mikan drills, and light-pressure finishing are excellent starting points.
How do you teach layup footwork to beginners?
Start without a basketball. Teach the final two steps slowly before adding the ball or dribble.
Which foot should players jump from?
For a right-handed layup, players traditionally jump from the left foot. For a left-handed layup, they jump from the right foot.
Should kids practice layups with both hands?
Yes. Start with the dominant side, but introduce the opposite hand early so players develop coordination on both sides.
Should beginners practice reverse layups?
Not immediately. Basic footwork, balance, and normal backboard finishes should come first.
How often should youth players practice layups?
Layups can be included in almost every practice through warm-ups, skill drills, transition activities, and small-sided games.
Final Thoughts
The best youth basketball layup drills begin with simple footwork.
Teach the final two steps.
Teach players to jump from the correct foot.
Help them use the backboard and finish with both hands.
Then gradually introduce dribbling, passing, movement, and defensive pressure.
Speed should come after control.
When proper footwork becomes automatic, young players can focus more on reading defenders and finishing confidently during games.
A reliable layup may look simple, but it is built through consistent repetitions and strong fundamentals.
